Featured post

Free Online Money Earning, no investment required

If you are trying to earn money online & need only small extra income less than $200 (Rs.12,000) then PTC sites are the best way to st...

Showing posts with label CM9. Show all posts

MIUIAndroid for Samsung Galaxy S3 - AT&T

Base: Cyanogenmod 10
Port: Galaxy Nexus MIUI JB 


Code:
#include 
/*
 * Your warranty is now void.
 *
 * I am not responsible for bricked devices, dead SD cards,
 * thermonuclear war, or you getting fired because the alarm app failed. Please
 * do some research if you have any concerns about features included in this ROM
 * before flashing it! YOU are choosing to make these modifications, and if
 * you point the finger at me for messing up your device, I will laugh at you.
 */
Changelog

v2.10.12
Quote:
old changelog: http://miui.connortumbleson.com/roms.../changelog.txt

Download

ROM: http://goo.im/devs/ibotpeaches/miuia...tt-2.10.12.zip
GApps: http://goo.im/gapps/gapps-jb-20120726-signed.zip

old
2.9.29 - http://goo.im/devs/ibotpeaches/miuia...att-2.9.29.zip
2.9.21d - http://goo.im/devs/ibotpeaches/miuia...tt-2.9.21d.zip
2.9.21 - http://goo.im/devs/ibotpeaches/miuia...tt-2.9.21b.zip


How do I flash?

General rule of thumb. If on 

-Stock, CM, AOKP, AOSP. You must do full wipe. That includes going to "format /system" in recovery. Then flash the ROM.
-If on MIUI. Dalvik & Cache wipe should suffice. If not, do above ^

-First boot will take 1-3 minutes. (As its dex/opting, but it doesn't have the animation of dex/opting loaded, so it sits at MI Logo)


Known Bugs 
  • Facebook freezes
  • Face detection enabled, but forgot libs

[NIGHTLY][ROM][4.1.2] CyanogenMod 10 for Samsung Galaxy S

CyanogenMod is a free, community built, aftermarket firmware distribution of Android 4.1 (Jelly Bean), which is designed to increase performance and reliability over stock Android for your device.
Code:
#include 
/*
 * Your warranty is now void.
 *
 * I am not responsible for bricked devices, dead SD cards,
 * thermonuclear war, or you getting fired because the alarm app failed. Please
 * do some research if you have any concerns about features included in this ROM
 * before flashing it! YOU are choosing to make these modifications, and if
 * you point the finger at me for messing up your device, I will laugh at you.
 */
CyanogenMod is based on the Android Open Source Project with extra contributions from many people within the Android community. It can be used without any need to have any Google application installed. Linked below is a package that has come from another Android project that restore the Google parts. CyanogenMod does still include various hardware-specific code, which is also slowly being open-sourced anyway.

All the source code for CyanogenMod is available in the CyanogenMod Github repo. And if you would like to contribute to CyanogenMod, please visit out Gerrit Code Review. You can also view the Changelog for a full list of changes & features.

What are Nightly builds? Auto compiled builds of the latest CyanogenMod source from github. This version change each night and aren't officialy supported. If you find bugs/issues you can/must discuss here (do not submit nightlies bug on CyanogenMod issue tracker).

Downloads
WARNING: Upgrading from version before 20120817 will wipe your phone

Latest nightly: http://get.cm/?device=galaxysmtd
Google Apps: http://goo.im/gapps

Installation

- First time flashing CM10 to your Galaxy S (or coming from another ROM)?
  1. Root your device and install ClockworkMod Recovery.
  2. Reboot into Recovery using 3-button-combo
  3. Do a Nandroid backup!
  4. WIPE (wipe data/factory reset + wipe cache partition)
  5. Install the ROM from internal sdcard using ClockworkMod Recovery
  6. Optionally install the Google Addon
- Upgrading from CM7/CM9?
  1. Do a Nandroid Backup!
  2. WIPE (wipe data/factory reset + wipe cache partition)
  3. Install the ROM from internal sdcard using ClockworkMod Recovery
  4. Optionally install the Google Addon
- Upgrading from another CM10 Build?
  1. Do a Nandroid Backup! WARNING: Upgrading from version before 20120817 will wipe your phone
  2. Install the ROM from internal sdcard using ClockworkMod Recovery
  3. Optionally install the Google Addon
Note: Nandroids of CM7, CM9 and CM10 are incompatible due to partition layout changes. Please be on the correct version before restoring Nandroids.

FAQ
Please read before posting or reporting bugs!

http://teamhacksung.org/wiki/index.p...sked_Questions

Reporting Bugs

You are allowed to report bugs only at the SGSCM10 bug tracker. Before reporting a bug, please make sure you are running as stock as possible. This means no custom kernel, no custom framework modification, etc. If you are using any of the above modifications, please flash the rom again to get rid of the modifications before reporting.

REPORT BUGS HERE: http://code.google.com/p/sgscm10/issues/list

Please check the list of issues before creating new issues.
  • Grab a logcat right after the problem has occurred. (Please include at least a few pages of the log, not just the last few lines, unless you know what you're doing.)
  • If it is a random reboot, grab /proc/last_kmsg. (Do not bother getting a logcat unless you can get it just before the reboot. A logcat after a reboot is useless)
Remember to provide as much info as possible. The more info you provide, the more likely that the bug will be solved. The following is a useful format to follow.

Code:
What is your--
Phone model:
Radio (baseband):
CM version:
CM Download url:
Gapps version:

Did you--
wipe:
 restore with titanium backup:
reboot after having the issue:

Are you using--
a task killer:
a non-stock kernel:
CMSettings/Performance settings (other than stock):
other modifications:

Provide any additional information (observations/frequency of problem/last version it worked on/etc) as needed:

[HOW TO] Build CM10 for Nexus 7

Hey all,  

So I've ported my "Build CyanogenMod" instructions (Nook Color, Nook Tablet, and HP Touchpad) to the Nexus 7.

The doc basically covers unlocking the N7, getting the build environment ready, downloading source, building, installing, and updating the source. The walkthrough is for Linux, but you should be able to do it via a virtual machine running on OS X and Windows such as Virtualbox (free).

The idea is that building Android from scratch should be possible for almost anyone to learn. So this guide walks you through it.

If you're running into difficulties, this thread is a place to exchange info, tips, questions, etc.

It's also a good place to proclaim loud and clear to the world...

"I'm running an OS I built myself from source!"

Off the top of my head...
  • You never, ever have to wait for a nightly
  • You can add or remove as-yet uncommitted features with ease.
  • You learn how Android works under the hood
  • You learn how to use Linux
  • You'll learn how to use git
  • You may, even accidentally, pick up a little C, Java, C++, and learn about the build system.
  • You can personalize Android-- make your own tweaks, replace kernels, modules, graphics, add or remove projects, overclock, underclock etc. In other words, you have control over every aspect of your device's functionality. Your build is custom to you.
  • You can audit the code for potential security issues such as back doors or trojans (as opposed to just trusting a random person who posts a build). Since CM10 source is open, you can examine every commit, and there are many eyes looking at the code. (does not apply to proprietary blobs, but these are pulled from your device, so you have and are using them already)
  • You can contribute features/fixes back upstream
  • You can start ports to other as-yet-unsupported devices (start by copying folders from similar devices to devices/manufacturer/model)
  • You come to really understand that Android phones and tablets are full-fledged general-purpose computers just like laptops and desktops.
  • AAAAND....you get huge bragging rights

The extent to which you delve into the above is entirely up to you. The walkthrough is just an introduction to that world. If N7 is anything like the NookColor/NookTablet/TouchPad, some people will build once and never do it again... but others will start to tinker and make changes to their own build and want to share them with others, and soon some will start making contributions back to official CM10 upstream... or port to new devices... and by fixing bugs and all this... everyone benefits.

Plus...
  • It's fun.

CyanogenMod 6.1.0 RC1 Available for Download | Download


CyanogenMod 6.1.0 RC1 Available for DownloadFor all you CyanogenMod fans out there this will make you happy, CyanogenMod released version 6.1.0 of their ROM for the following devices:
Many users have reported issues with the marketplace, but those issues are being fixed. As for the features of this new release here are some of the big ones:
  • Updated to Android 2.2.1
  • Camcorder touch-to-focus
  • Continuous Autofocus
  • Quick Pin Unlock
  • FM Radio Support N1/Bravo/Supersonic
  • EMMC Support
  • Kill Foreground apps by long-pressing back.
And many more which your can read about here. To find the release for your device visit the devices forum and check for any release threads, or go to the CyanogenMod Site.

CyanogenMod 10 Released on HP Touchpad and Wildfire S


CyanogenMod 10 Released on HP Touchpad and Wildfire SAt this point, it just wouldn’t feel like summer unless we spent a little time talking about Jelly Bean. With releases coming out for seemingly everyone at this point, the devices with ports almost outnumber devices without. As the march continues, two new devices have managed to get some Jelly Bean—one of which becomes the second device to get Jelly Bean that wasn’t released as an Android device. They are the HP Touchpad and the HTC Wildfire S.
For the HP Touchpad, the unofficial CyanogenMod 10 port was developed by XDA Forum Member jcsullins, but posted on XDA by XDA Senior Member BIGSimon. For the Wildfire S, XDA Recognized Contributor benjamingwynn posted the unofficial CyanogenMod 10 build with credited help from about 10 other members. As should be expected, both ROMs do have their issues. The Wildfire S port is in its preview stage, meaning that it’s just for testing and shouldn’t be used unless you’re willing to help with testing and development. Of course, the HP Touchpad isn’t too much better, as the number of issues far exceeds the number of features working. The HP Touchpad does have the disadvantage of not having run Android from the outset, but that hasn’t stopped the HTC HD2 developers either.
Even so, it’s a beginning and both ROMs are currently under active development. So users just need to exercise a little patience, and both of these ROMs mat soon be stable enough to use. For more info, check out either the HP Touchpad thread or the Wildfire S thread.

This Thread Is For Them Who Bricked There Phones


We will help you with every possible solutions.

Here are some quick tips :
(Here I'll use the terms like Download-Mode & Recovery-Mode, If you dont know what are they please click here. There "BOOT to RECOVERY" & "BOOT to BOOTLOADER" means how to enter into Recovery-Mode & Download-Mode respectively.)


A Bricked Phone May Have One or More (Below Problems) :

1. Booting to the ROM(Android) not possible.
2. Booting to the Recovery-Mode not possible.
3. Black screen or Bootloop(Repeated Restarting of Phone at Boot Animation or Samsung Galaxy Y Logo).


Possible Solutions :
(Remember there'll be data loss using these solutions so always try to keep a backup)

1. If you can still enter into Recovery-Mode 
(a). Try to clear Data & Cache then check.
(b). Try Installing a Custom ROM using CWM(ClockWorkMod Recovery) & check.
(For Custom ROM & CWM Visit here.)

2. If Recovery-Mode didn't helped Enter into Download-Mode & flash an odin supported stock rom(using ODIN 1.84 or 1.85) from Doky73's Thread(Flashing Guide in 2nd post).


*You can inform me, if anything left out.

Note :
1. I'll be not held responsible for anything that happens to your phone.
2. Before posting try to search for similar type problems out there & try the solution, if that doesn't solve your problem then post here.

[compilation] Clean & Prerooted Nandroid backups and System folder of android 4.0.4 Ice Cream Sandwich | Download


This list will be extended and modified,
All suggestions are welcome 

State: 
All clean, fresh from install.
No modifications (like language) done to it.
Comes pre-rooted and are from the Generic Global World version.
So all languages should be in it.

Compatibility:
Should work on any Xperia Arc LT18 and Xperia arc s LT18i

How-to for Nandroid restore:
- Put the extracted folder in your SD Card/Clockorkmod/backup
- Go/boot into Clockworkmod recovery (If your kernel doesn't has that built in, boot from this file using fastboot, command: "fastboot boot recoveryARC.img")

- First wipe data/factory reset
- Navigate to backup and restore and choose the folder you want to restore
- Wait until its done
- Reboot

How-to for System folder:
- Use it if you need it 
- To replace/repair broken apps, framework, etc.

[Android 4.0.4] 4.1.B.0.431 

Nandroid Backup Download link ---> Klick 
Active
System folder Download link ---> Klick 
Active

[Android 4.0.3] 4.1.A.0.562

Nandroid Backup Download link ---> Klick 
Active
System folder Download link ---> Klick 
Active

[Android 2.3.4] 4.0.2.A.0.62

Nandroid Backup Download link ---> Klick 
Active
System folder Downlo3d link ---> Klick
Active

[Android 2.3.4] 4.0.2.A.0.42

Nandroid Backup Download link ---> Klick
Active
System folder Download link ---> Klick 
Active

Google Chrome For Android apk Download


Description

The speed and simplicity of Chrome, now on your Android phone and tablet.
Search and browse fast with Chrome on your Android phone and tablet. Sign in to sync your personalized Chrome experience from your computer to bring it with you anywhere you go.


Download : Google Chrome

Google Play Download here.

Search fast
- Search and navigate fast, directly from the same box. Choose from results that appear as you type.
-  Browse faster with accelerated page loading, scrolling and zooming.
Simple, intuitive experience
- Open and quickly switch between an unlimited number of tabs. On your phone, flip through tabs the way you would fan a deck of cards. On your tablet, swipe from edge to edge to switch tabs.
Sign in
- Sign in to Chrome to sync your open tabs, bookmarks, passwords, and omnibox data from your computer to your phone or tablet.  Pick up right where you left off.
- Send pages from Chrome on your computer to Chrome on your phone or tablet with one click and read them on the go, even when you’re offline.
Privacy
- Browse privately in Incognito mode.

Cyanogenmod 9 (CM9) for Galaxy S3 i9300 | [Guide] + Video Tutorial


Thanks to incredible group of developers specifically dedicated to Samsung android devices, TeamHacksung, Cyanogenmod 9 custom rom (or CM9 in short) is now available for the Galaxy S3, i9300. And this has been achieved within 3 weeks of the Galaxy S3′s launch, which is impressive, even for the Team, IMHO.
XpLoDWilD, team member of TeamHacksung and recognized developer at xda-forums, shared the CM9 for Galaxy S3 moments ago. So, those of you who were waiting desperately for this, the moment has arrived. And also those who have heard a lotabout it and wanna give it a try, can gladly do so on Galaxy S3. The good thing actually is, even with this being the first nightly build, there aren’t too many and nothing serious at all or kind of deal-breaker bugs here to spoil the mood, especially if you tried the CM7 on Galaxy S when it had just been ported. Btw, CM9 is also available on old devices, the Galaxy S i9000 and theGalaxy S2 i9100.
The only bugs with this first CM9 nightly for Galaxy S3, as of June 17, 2012, are: FM Radio not supported,LED cannot be used in Camera which causes Force Closes on some phones (all other camera things work just fine) and lastly, Wi-Fi connection issues for some, for which there is a working fix too until the bug itself is ironed out completely. So, as I said earlier no deal-breaker bugs with this Galaxy S3 Cyanogenmod 9 build, just go ahead and install it using the instructions set below on the Galaxy S3 i9300 near you. Check out the Known Issues page linked below under Links section just below to get updated list of bugs as the development goes on and new builds come out.
But before we head to instructions, let us share some official links and let’s also give credit to team.

Compatibility

This guide is applicable only for Samsung Galaxy S3 international version GT-i9300 — one with Exynos quad-core processor and 1GB RAM. It is NOT for Galaxy S3 at Verizon, Sprint, AT&T, T-Mobile, US Cellular and any other Canadian Galaxy S3. Check your phone’s version in Settings – About Phone. It has to be “GT-i9300” for this Cyanogenmod 9 rom to be compatible with your phone.

Warning!

The methods and procedures discussed here are considered risky and you should not attempt anything if you don’t know completely what it is. If any damage occurs to you or your device, we won’t be held liable — you only will be responsible, you’ve been warned!!!

How to Install Cyanogenmod 9 on Galaxy S3 i9300

Here’s the installation guide to install the world-famous and widely adored rom, CM9 on Galaxy S3.
  1. You need clockworkmod (cwm) recovery to be able to install/flash the Cyanogenmod 9 on Galaxy S3. To get that, Install CF-Root, which gets you both root and (cwm) clockworkmod recovery at one shot — easy and simple. Once you have got CF-Root from there, jump to next step.
  2. Download the Cyanogenmod 9 from official development page: Link. (This file will be flashed in step 8 below.)
  3. Download the Google Apps package. This will install apps like Market, Gmail, etc. which are not present in the ROM by default. (This file will be flashed in step 9 below.)
    Download Link  |  Filename: gapps-ics-20120317-signed.zip
  4. Connect phone to PC and transfer the two zip files you downloaded in step 2 and 3 to your Galaxy S3, on the internal sdcard that shows up on PC upon connecting.
  5. Disconnect the phone from PC. And power off the phone, wait till it vibrates and the two capacitive lights (Menu and Back keys) go off, to confirm complete power off.
  6. Now, enter the awesome thing that we call clockworkmod (cwm) recovery. For this, press and hold these 3 buttons together: Volume Up + Home + Power until you see Samsung logo on screen, upon which you can release them all. You’ll enter recovery mode soon enough. (Use volume keys to browse between options in recovery while power key to select to select an option.)
  7. [Optional] It’s recommended you create a backup from the clockworkmod recovery your phone is in right now, using the option Backup and Restore » select backup from internal sdcard. You can restore this backup to get everything to normal in case something turns out bad. You just need cwm recovery for this, which you always get from the link above, in step 1.
  8. Wipe stuff now to prepare for installation of CM9 on Galaxy S3:
    1. Do Wipe Data/Factory Reset — select the option and then select yes on next screen to confirm it.
    2. Do Wipe Cache Partition – select the option and then select yes on next screen to confirm it.
    3. Go to advanced and do Wipe Dalvik Cache — select the option and then select yes on next screen to confirm it.
  9. Flash the Cyanogenmod 9 on Galaxy S3. Now, form the main menu in recovery, select the optioninstall zip from sdcard, then select choose zip from internal sdcard, and then browse to folder location where you transferred the 2 files in step 4 above, then select the CM9 rom file (which you downloaded in step 2 above). Select Yes – Install _____.zip on next screen to start flashing it. Flashing of CM9 rom will be started.
  10. Now, you need to flash the Google Apps too. So, after step 9 is finished and you are back to recovery, go back to the recovery’s main menu. Select the option install zip from sdcard, then selectchoose zip from internal sdcard, and then browse to folder location where you transferred the 2 files in step 4 above, then select the Gapps file (which you downloaded in step 3 above) . Select Yes – Install _____.zip on next screen to start flashing it. Once gapps have been flashed, go back to recovery’s main menu.
  11. Select reboot system now to reboot the phone and boot up into lovely CM9 rom, void of all Samsung bloatware and its TouchWizUX UI (although some may miss it), based on Android 4.0.4 and taste the pure android experience as Google meant it to be.

Video Tutorial

Share your thoughts on the ROM in the comments below. And also let us know if you need any assistance in flashing the CM9 Galaxy S3 rom.

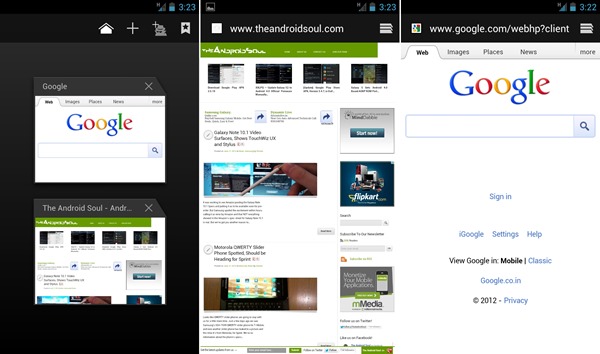
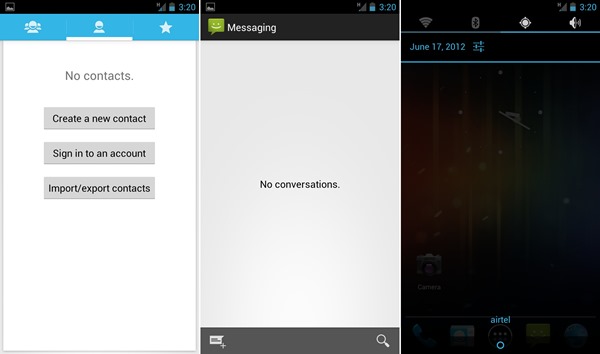
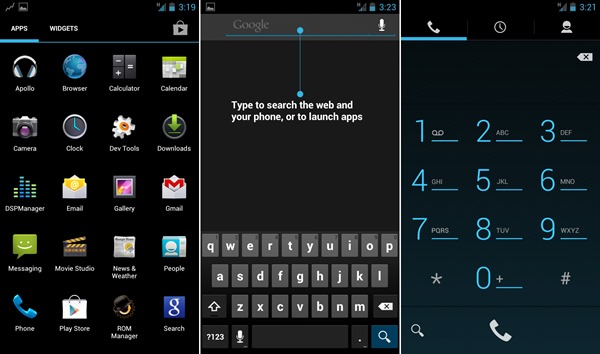
Galaxy S3 CM9 Screenshots

i9300 Galaxy S3 CM9
CM9 Galaxy S3 Rom
Cyanogenmod 9 for Galaxy S3 i9300
Androite XDA. Powered by Blogger.